SQLite
SQLite (https://www.sqlite.org/) is light-weight SQL database and it is built into both Android and iOS devices.expo-sqlite is the library that gives an access to SQLite database on the device.
Installation:
npx expo install expo-sqlite
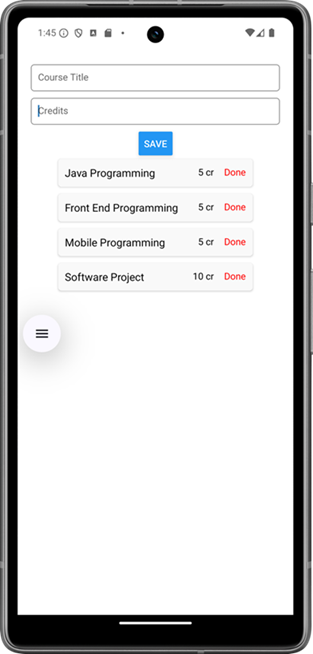
Example: Course list app where user types course title and credits. The course is saved to a database when save button is pressed. All courses are displayed in the flatlist component.
First, import the SQLite from expo-sqlite to your Component
import * as SQLite from 'expo-sqlite';
Define a TypeScript type that matches the database schema:
type Course = {
  id: number;
  title: string;
  credits: number;
};
States are needed for title and credit input fields and all courses that are shown in the FlatList.
const [credit, setCredit] = useState('');
const [title, setTitle] = useState('');
const [courses, setCourses] = useState<Course[]>([]);
Next, we intialize the database connection using the openDatabaseSync function. The function takes a single argument, which is the name of the SQLite database file to open or create. If the specified database file exists, it will be opened. If it doesn't exist, a new database file with that name will be created.
const db = SQLite.openDatabaseSync('coursedb');
The library has synchronous and asynchronous versions of functions. Running heavy tasks with synchronous functions can block the JavaScript thread and affect performance.
We will be using mostly asynchronous functions in this example. For simplicity, we make here a synchronous call to open the database.
Opening the database returns database object. Using the methods of the database object we can execute SQL queries.
First we need create the database schema in case this is the first invocation of the application. We write a function to create the schema and use the execAsync method to execute the SQL query.
const initialize = async () => {
  try {
    await db.execAsync(`
      CREATE TABLE IF NOT EXISTS course (id INTEGER PRIMARY KEY NOT NULL, credits INT, title TEXT);
    `);
    // Todo: update the course list
  } catch (error) {
    console.error('Could not open database', error);
  }
}
Because we use the async-awaitsyntax to handle the asynhronous calls we need to use try-catch `exception handling to handle possible database errors.
The application logic would require that we retrieve the course list from the database and render it for the user at startup. The function to do that will be implemented later.
We make only one query but multiple queries could be done in one execAsync call. For that reason we need to terminate the query with a semicolon (;).
The database initialization function is called using the useEffect hook.
useEffect(() => { initialize() }, []);
Next we need a way to create content in the database. We add two input fields (title and credits) and a button to save the new item to the database when pressed. The button will call function saveItem.
<TextInput
  placeholder='Title'
  onChangeText={title => setTitle(title)}
  value={title}/>
<TextInput
  placeholder='Credits'
  keyboardType='numeric'
  onChangeText={credit => setCredit(credit)}
  value={credit}/>
<Button onPress={handleSave} title="Save" />
We write function handleSave to make the INSERT query to add rows into the database. We use runAsync method to execute the query.
const handleSave = async () => {
  try {
    await db.runAsync('INSERT INTO course (title, credits) VALUES (?, ?)', title, credit);
    // Todo: update the course list
  } catch (error) {
    console.error('Could not add item', error);
  }
};
The ? placeholders keep user input separate from the SQL syntax, preventing SQL injection attacks and ensuring values are treated as data, not executable SQL.
You can also use tagged template literals: https://docs.expo.dev/versions/latest/sdk/sqlite/#tagged-template-literals-api:
const handleSave = async () => {
  try {
    await db.sql`INSERT INTO course (title, credits) VALUES (${title}, ${credit})`;
    // Todo: update the course list
  } catch (error) {
    console.error('Could not add item', error);
  }
};
the template literal is passed directly as a tag. The values inside ${} are still treated as safe bind parameters, so SQL injection protection is maintained.
Finally we can implement the function handleFetch to get the list of courses from the database. The function makes a SELECT query using method getAllAsync to fetch all rows from the course table and updates the data to state variable courses. The state update launches a re-render.
const handleFetch = async () => {
  try {
    const list = await db.getAllAsync('SELECT * from course');
    setCourses(list as Course[]);
  } catch (error) {
    console.error('Could not get items', error);
  }
}
The handleFetch function should be executed at first render and after any successful change in the database. Add the updateList call to the placeholders in the functions defined earlier.
In the FlatList component, we show the title and credits of the courses. For deleting courses we add a Text component on each row and attach an onPress action to that calls function handleDelete to each component. The unique id of the item is passed to the delete function.
<FlatList
  keyExtractor={item => item.id.toString()}
  renderItem={({ item }) =>
    <View style={{ flexDirection: 'row'}}>
      <Text>{item.title}</Text>
      <Text>{item.credits} </Text>
      <Text style={{ color: '#ff0000' }} onPress={() => handleDelete(item.id)}>Delete</Text>
    </View>
  }
  data={courses}
/>
The handleDelete function deletes item from the course table and updates the course list after the deletion.
const handleDelete = async (id: number) => {
  try {
    await db.runAsync('DELETE FROM course WHERE id=?', id);
    await handleFetch();
  }
  catch (error) {
    console.error('Could not delete item', error);
  }
}
Using SQLiteProvider component
If there are sevaral components in the application, SQLiteProvider component can be used to share the database across the components. All components rendered within a SQLiteProvider can access the database using the useSQLiteContext hook.
Let us refactor the application into two components: App provides the database context to all component within the app and Courselist renders the course list application.
import { SQLiteProvider, SQLiteDatabase } from 'expo-sqlite';
import Courselist from './Courselist';

export default function App() {

  const initialize = async (db: SQLiteDatabase) => {
    db.execAsync(`
      CREATE TABLE IF NOT EXISTS course (id INTEGER PRIMARY KEY NOT NULL, credits INT, title TEXT);
    `);
  };

  return (
    <SQLiteProvider
      databaseName='coursedb.db'
      onInit={initialize}
      onError={error => console.error('Could not open database', error)}
    >
      <Courselist />
    </SQLiteProvider>
  );
}
SQLIteProvider properties:
databaseNamedefines the database file name.SQLiteProvidertakes care of opening the database.onInitdefines an initialization handler that is run before rendering the children of the component. We use it to create the database schema.onErrorhandler is called if an error occurs.
The Courselist component gets the database object by calling the useSQLiteContext hook.
import { useSQLiteContext } from 'expo-sqlite';
// ...

export default function Courselist() {
  const [credit, setCredit] = useState('');
  const [title, setTitle] = useState('');
  const [courses, setCourses] = useState<Course[]>([]);

  const db = useSQLiteContext();

  const handleSave = async () => {
    try {
      await db.runAsync('INSERT INTO course VALUES (?, ?, ?)', null, credit, title);
      await handleFetch();
    } catch (error) {
      console.error('Could not add item', error);
    }
  };

  // ...

  useEffect(() => { handleFetch() }, []);
  // ...
Because the database initialization is done in an other component, we need to launch the initial list update using the useEffect hook.
You can also use Drizzle ORM (https://orm.drizzle.team/) or Knex.js query builder (https://knexjs.org/) with Expo SQLite. Read more about 3rd party library integrations in https://docs.expo.dev/versions/latest/sdk/sqlite/#third-party-library-integrations.
The database can be encrypted using SQL Chipher extension (https://www.zetetic.net/sqlcipher/).
Debugging SQLite database
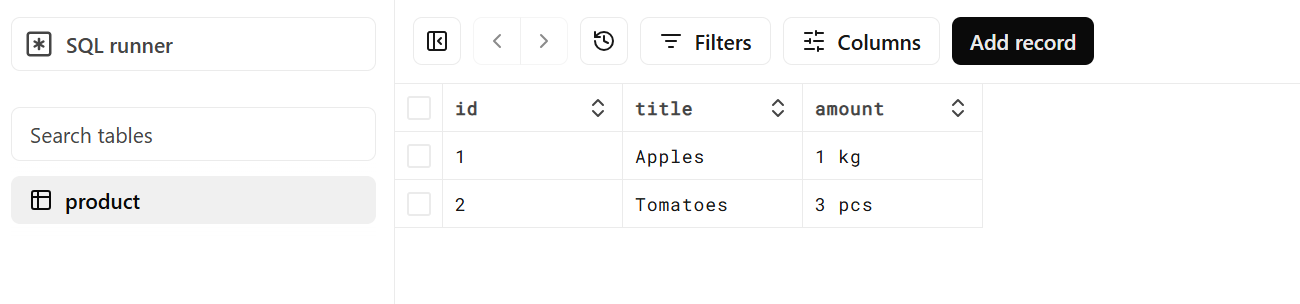
You can browse on-device SQLite database using Drizzle Studio (https://orm.drizzle.team/drizzle-studio/overview).
To get started, install Expo Drizzle Studio plugin:
npm install expo-drizzle-studio-plugin
Then, setup Drizzle Studio plugin:
import { useDrizzleStudio } from "expo-drizzle-studio-plugin";
import * as SQLite from "expo-sqlite";
import { View } from "react-native";

const db = SQLite.openDatabaseSync("db");

export default function App() {
    useDrizzleStudio(db);

    return <View></View>;
}
Run your app on physical device or emulator. Open the devtools menu from the terminal:
shift + m
Select expo-drizzle-studio-plugin.
Drizzle Studio opens in a browser and you can browse your database. You can also add new records to your database.