Flatlist
FlatList is a versatile list component with several useful features, including headers, footers, and scrolling capabilities.
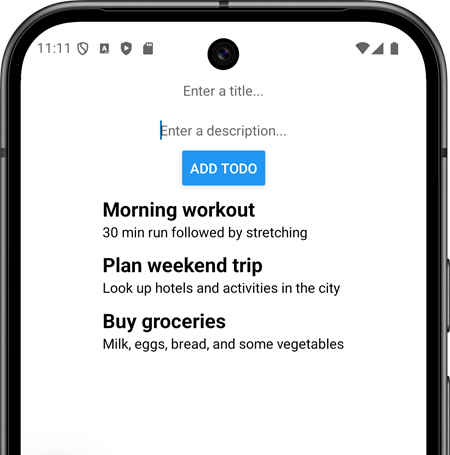
In the next example, we create a simple todo app that looks the following:
Using the FlatList component:
Import the FlatList component from React Native:
import {
  StyleSheet,
  Text,
  View,
  Button,
  TextInput,
  FlatList,
} from "react-native";
First, we define a type for the todo items:
type TodoItem = {
  title: string,
  description: string
}
Declare new states to manage text input value and FlatList items:
// import useState
import { useState } from 'react';

// declare states
const [todo, setTodo] = useState<TodoItem>({ title: "" , description: "" });
const [todos, setTodos] = useState<TodoItem[]>([]);
Next, we render the TextInput and Button components:
return (
  <View style={styles.container}>
    <TextInput
      value={todo.title}
      onChangeText={text => setTodo({...todo, title: text})}
      placeholder='Enter a title...'
    />
    <TextInput
      value={todo.description}
      onChangeText={text => setTodo({...todo, description: text})}
      placeholder='Enter a description...'
    />
    <Button title='ADD TODO' onPress={handlePress}  />
  </View>
);
The handlePress function is called when the Add button is pressed. This function adds the current value of the todo state (representing the new task) to the todos state array. After adding the task to the array, the todo state is reset to an empty string, clearing the TextInput for the next task input.
const handlePress = () => {
  setTodos([...todos, todo]);
  setTodo({ title: "", description: "" });
};
Render the FlatList component to display all todos.
<FlatList
  data={todos}
  renderItem={({ item }) =>
    <View>
      <Text>{item.title}</Text>
      <Text>{item.description}</Text>
    </View>
  }
/>
The renderItem prop defines how data items are rendered within the list. The data prop indicates the source of the data, which must be an array. The keyExtractor prop extracts a unique key for each item in the list. It that is not defined, index will be used. The renderItem must return a single root element. To return multiple elements, wrap them in a container.
Next, we will add styling to the todo items in the list. We will display the title in a bigger font and bold. For that, we will create a new style:
const styles = StyleSheet.create({
  container: {
    paddingTop: 50,
    flex: 1,
    backgroundColor: '#fff',
    alignItems: 'center',
    justifyContent: 'center',
  },
  titleText: {
    fontSize: 20,
    fontWeight: 'bold',
  },
});
Then, we can use titleText style in the list item:
<FlatList
  style={{ marginTop: 10 }}
  data={todos}
  renderItem={({ item }) =>
    <View>
      <Text style={styles.titleText}>{item.title}</Text>
      <Text>{item.description}</Text>
    </View>
  }
/>
There is also FlashList component (https://shopify.github.io/flash-list/) that is developed by Shopify. It is designed to handle large datasets efficiently. It is optimized for memory usage and it is suitable for applications that require smooth scrolling and rendering of large lists.
Read the FlatList documentation in https://reactnative.dev/docs/flatlist.
- Add
ListEmptyComponentto show text "No data" when the list is empty. - Use
ItemSeparatorComponentto render thin line between each list item. You can create aViewwith a height of 1 and a background color to render a line separator between items in aFlatList.