CD pipeline
Deployment
We will do our first deployment to Render.com (https://render.com) that provides free Hobby plan for small-scale applications. There are some limitations in free plan that you should be aware. The deployments are much slower when using free plan and free instances will spin down with inactivity, which can delay requests by 50 seconds or more. We are going to deploy the Node Express app that we used in the CI pipelines chapter earlier.
In this chapter, we continue working with the calculator Node.js application introduced in the CI workflow section.
First, you have to create an account to Render.com in https://dashboard.render.com/register. After you have sign-in to Render, select New --> Web Service in your workspace.
Next, you can select public GitHub repository where your project is hosted and press the Connect button (Use your own forked repository).
In the web service form, fill in the following details:
| Field | Value |
|---|---|
| Language | Node |
| Branch | main |
| Build command | npm install |
| Start command | npm start |
In the Instance Type select Free option
Finally, press the Deploy button. After the deployment starts, you will be redirected to a page where you can see the deployment log. Wait until, you get the message that your service is live:
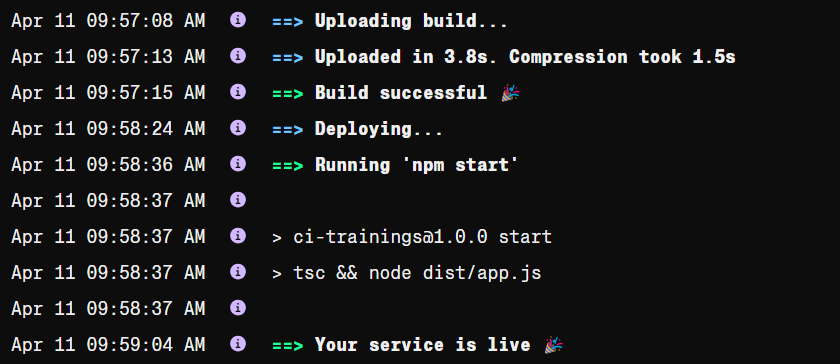
As you can see the deployment to modern hosting providers is really straigthforward.
By default, Render automatically deploys your service whenever you update its code in linked GitHub repository. Opent the app.ts file and change the message that is displayed when you navigate to the root endpoint:
app.get('/', (req, res) => {
  res.json({ message: 'Calculator API is running on Render.com' });
});
Push your changes to the repository and see that the GitHub actions workflow fails.
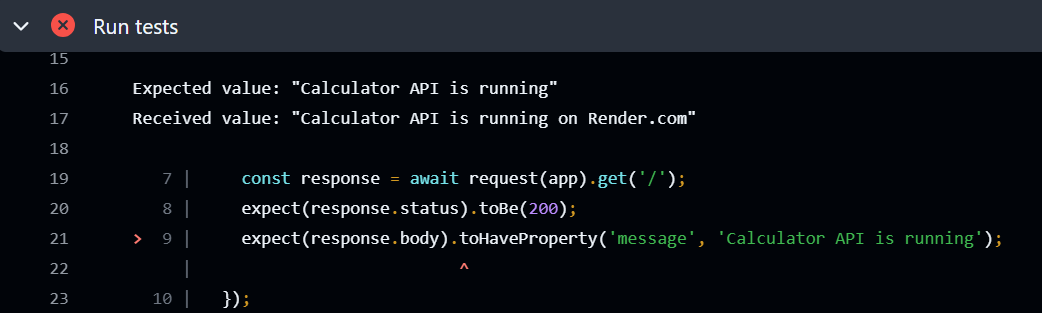
One of the tests does not pass, yet the application is still automatically deployed to Render.com. Deployments should only occur after all linting and tests have successfully passed..
CI/CD Pipeline
In this phase we will modify our GitHub actions workflow so that deployment is done only after linting and tests are passed. We will use web hooks to trigger deployment after linting and tests are passed. If you are not familiar with web hooks you can read more here. The instructions to use web hooks for the deployment in Render.com can be found here.
First, we will disable automatic deployment from the Render.com web service. Navigate to the settings page of your web service and select No from the Auto-Deploy.

Next, we have to get hook url. Navigate to your Render.com web service's settings and scroll down to Deploy Hook. Copy your private hook url and remember to keep that secret.

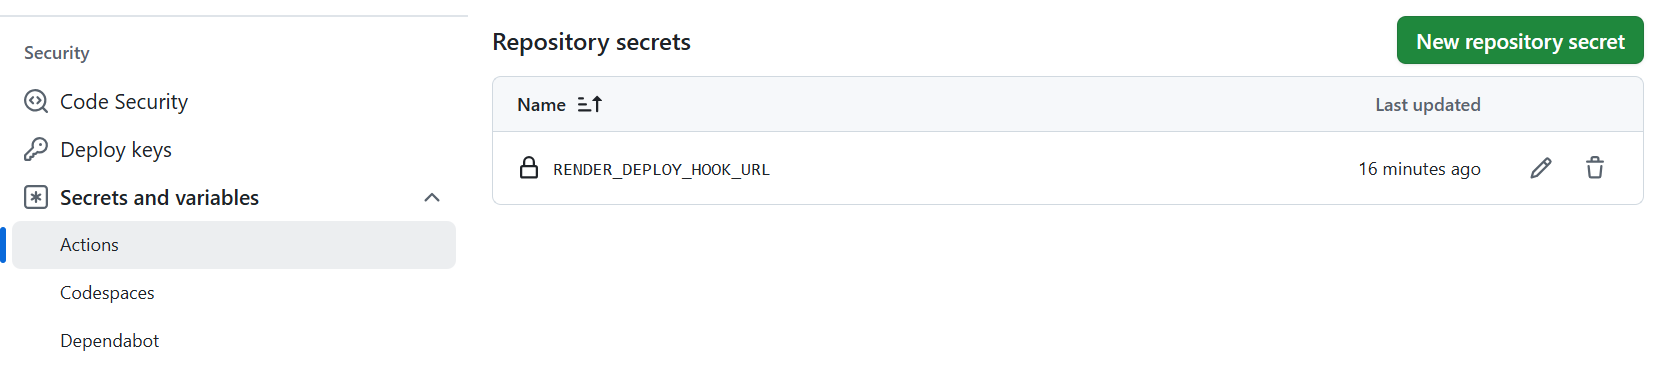
To securely use the deployment hook URL in your GitHub Actions workflow, you should store it as a secret. Navigate to your repository's settings, and from the left-side menu, select Secrets and variables. Create a new Repository secret, name it RENDER_DEPLOY_HOOK_URL, and paste the deployment hook URL you copied from Render.com into the secret value field. Finally, click the Add Secret button to save it.
You can read more about secrets here.
Now, we can modify our Github actions workflow. Add the following Deploy step in your GitHub Actions workflow. It is responsible for triggering a deployment to the Render.com using a deployment hook URL.
# Node.js CI/CD pipeline
name: Node.js CI/CD

on:
  push:
    branches: [main]
  pull_request:
    branches: [main]

jobs:
  Node-ci-pipeline:
    runs-on: ubuntu-latest
    steps:
      - uses: actions/checkout@v4
      - uses: actions/setup-node@v4
        with:
          node-version: '24'
      - name: Install dependencies
        run: npm ci
      - name: Linting
        run: npm run lint
      - name: Run tests
        run: npm run test
      - name: Build
        run: npm run build
      # Deployment to Render.com
      - name: Deploy
        env:
          deploy_url: ${{ secrets.RENDER_DEPLOY_HOOK_URL }}
        run: |
          curl "$deploy_url"
- The
deploy_urlis set using a secret stored in your GitHub repository (RENDER_DEPLOY_HOOK_URL). Secrets are securely stored and not exposed in logs, ensuring sensitive information like deployment URLs or API keys remains protected. - The
curlcommand is used to make an HTTP request to the deployment hook URL ($deploy_url). This triggers a deployment process on a Render, which listens for such hooks to start deploying the latest version of your application.
Once the deployment is triggered, navigate to the Events section in your Render.com web service dashboard. Here, you should see a new deployment event. After the deployment completes, the latest version of your application will be live.
In the previous example, deployment is triggered for both pushes and pull requests. However, we only want to deploy when code is pushed directly to the main branch. To achieve this, you can use the if condition to ensure deployment runs only on pushes to main.
We will also create own job for the deployment. We can use needs to specify that the deploy job should only run after the ci job has completed successfully. This ensures that deployment only happens if all previous steps—such as linting, building, and testing—have passed.
name: Node.js CI/CD

on:
  push:
    branches: [main]
  pull_request:
    branches: [main]

jobs:
  ci:
    runs-on: ubuntu-latest
    steps:
      - uses: actions/checkout@v4
      - uses: actions/setup-node@v4
        with:
          node-version: '24'
      - name: Install dependencies
        run: npm ci
      - name: Linting
        run: npm run lint
      - name: Run tests
        run: npm test
      - name: Build
        run: npm run build

  deploy:
    if: github.event_name == 'push' && github.ref == 'refs/heads/main'
    needs: ci
    runs-on: ubuntu-latest
    steps:
      - name: Deploy to Render
        env:
          deploy_url: ${{ secrets.RENDER_DEPLOY_HOOK_URL }}
        run:  curl "$deploy_url"
It is also a good practice to check if the deployment secret is available before attempting to trigger the deployment. If the secret is missing, the workflow should exit with an error message. You can add a step before the deployment to verify that the secret is set:
- name: Deploy
  run: |
    if [ -z "$RENDER_DEPLOY_HOOK_URL" ]; then
      echo "RENDER_DEPLOY_HOOK_URL secret is not set."
      exit 1
    fi

    curl "$deploy_url"
This ensures that your deployment step will only run if the required secret is present, preventing failed or incomplete deployments due to missing configuration.
You can also check the status of the deployment request in the workflow logs. After the deployment step runs, the output from the curl command will indicate whether the request to the Render.com deploy hook was successful. For more detailed deployment status, visit your Render.com dashboard and review the deployment logs and events.
Triggering manually
Sometimes you want a workflow that only runs when a human explicitly tells it to run. This is common when you want to perform deployments manually, run maintenance scripts, or trigger jobs that should not happen automatically on every push or pull request. For example, you might want to deploy to production only after verifying everything in a staging environment, or run a database migration script as needed.
This is done with the workflow_dispatch event in your workflow file:
on:
  workflow_dispatch:
Read more about workflow_dispatch in Github documentation.
Environments
Environments are named deployment targets that represent different stages of your application's lifecycle, such as development, staging, and production. They help you manage deployments, apply environment-specific protection rules, and control access to sensitive resources.
In GitHub Actions, you can define environments in your repository settings. Each environment can have specific secrets, required reviewers, and deployment branch restrictions. This allows you to enforce approval workflows or add manual checks before deploying to critical environments like production.
To use environments in your workflow, specify the environment key in your deployment job:
jobs:
  deploy:
    runs-on: ubuntu-latest
    environment: production
    steps:
      - name: Deploy
        run: echo "Deploying to production"
You can also set up environment-specific secrets (e.g., RENDER_DEPLOY_HOOK_URL) that are only available to jobs running in that environment. This helps keep sensitive information secure and ensures that only approved workflows can access production credentials.
Read more about environments in the GitHub Actions documentation.
Multiple workflows
A common practice is that linters and tests are often run in the same workflow, but deployment is kept in a separate workflow. This way you get a clean separation, where one workflow handles lint/tests and another handles deployment only after the first one is green.
In our case workflows could be the following:
name: CI

on:
  push:
    branches: [main]
  pull_request:
    branches: [main]

jobs:
  Node-ci-pipeline:
    runs-on: ubuntu-latest
    steps:
      - uses: actions/checkout@v4
      - uses: actions/setup-node@v4
        with:
          node-version: '24'
      - name: Install dependencies
        run: npm ci
      - name: Linting
        run: npm run lint
      - name: Run tests
        run: npm run test
      - name: Build
        run: npm run build
We want to make sure that the deploy runs only if the CI has passed. We can use the workflow_run trigger in the deployment workflow.
name: CD

on:
  workflow_run:
    workflows: ["CI"]
    types:
      - completed

jobs:
  deploy:
    if: github.event_name == 'push' && github.ref == 'refs/heads/main'
    runs-on: ubuntu-latest
    steps:
      - name: Deploy
        env:
          deploy_url: ${{ secrets.RENDER_DEPLOY_HOOK_URL }}
        run: |
          curl "$deploy_url"